How to Start a Shopify Store in 2026 (Step-by-Step)
Step 1 – Create Your Shopify Account
Start by creating your free Shopify account. The whole process takes just a few minutes and you can choose your paid plan later, after you’ve tested the platform. If you want an extended trial, you can use our special Shopify link that gives you 3 months for just $1 per month on eligible plans.
- Go to shopify.com and click the “Start free trial” button on the homepage.
- Enter your email address, create a password and choose a store name, then click “Create store”.
- Answer the quick onboarding questions (what you plan to sell, where you are, whether you’re already selling) and click “Next” until you land in the Shopify admin dashboard.
- Save the login URL (usually your-store-name.myshopify.com/admin) and your credentials so you can easily return to your dashboard later.
Step 2 – Configure Basic Store Settings
Before you start adding products, take a few minutes to configure your basic store settings. This makes your store look professional, ensures that invoices and emails show the correct details, and prevents headaches later when you start getting real orders.
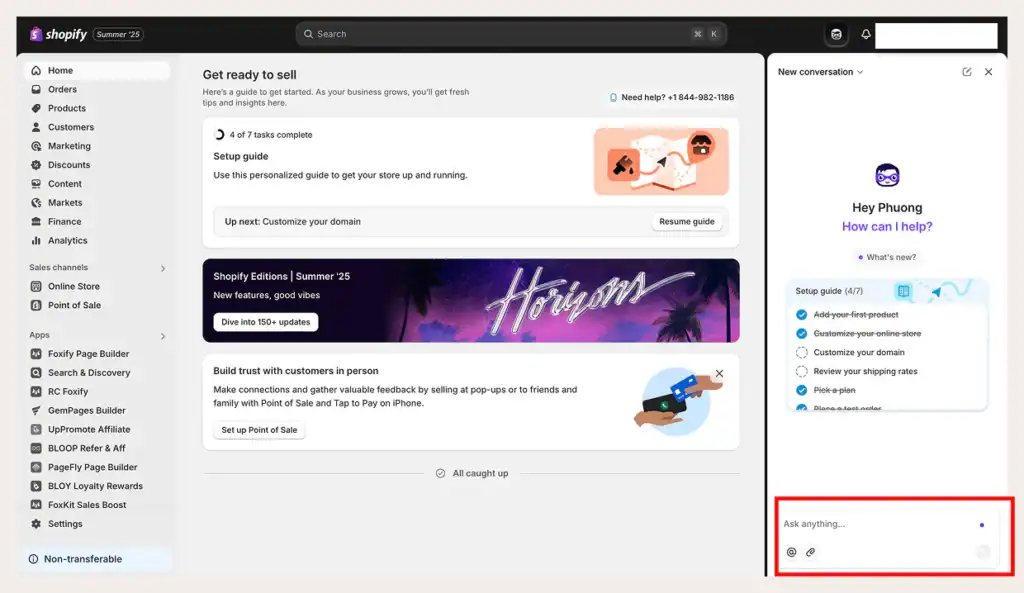
- In your Shopify admin dashboard, click “Settings” in the bottom-left corner.
- Open “Store details” and set your store name, legal business name (if you have one), address, phone number, time zone and default currency.
- Go to “Markets” and choose the countries or regions where you want to sell first, so Shopify can apply the right defaults for languages, currencies and taxes.
- Open “Notifications” and make sure the contact email is the one where you want to receive order emails and customer messages.
Step 3 – Choose and Customize Your Theme
Now it’s time to make your store look like a real brand. Shopify’s free themes are fast, mobile-friendly and easy to customize, so you don’t need any coding skills to get a clean, modern design.
- In the Shopify admin, go to “Online Store → Themes”.
- Under “Theme library”, click “Explore free themes” or visit the Shopify Theme Store and pick a simple, fast theme like Dawn or another modern free theme.
- Click “Add” to add the theme to your store, then click “Customize” to open the Theme Editor.
- In the Theme Editor, customize your logo, colors, fonts and homepage sections (hero banner, featured collection, testimonials) so they match your brand and make the store easy to navigate.
Step 4 – Add Products and Collections
With your basic settings and theme in place, it’s time to add the products you want to sell. Adding products and grouping them into collections makes it easy for customers to browse your store and for Google to understand what your shop is about.
- In your Shopify admin dashboard, click “Products → Add product”.
- Enter a clear product title that describes what you are selling (for example, “Minimalist Black Leather Wallet”).
- Write a product description that focuses on benefits, key features and use cases, instead of just listing specs.
- Upload 3–5 high-quality product images from different angles, and set one of them as the main product image.
- Set your price, compare-at price (if you want to show a discount), SKU and inventory quantity so Shopify can track stock levels.
- In the “Shipping” section, add the product weight and choose whether this product requires shipping.
- Scroll down to the “Search engine listing” section and click “Edit”. Add an SEO-friendly title and meta description that include your main keyword.
Once you have a few products created, group them into collections so customers can quickly find what they’re looking for.
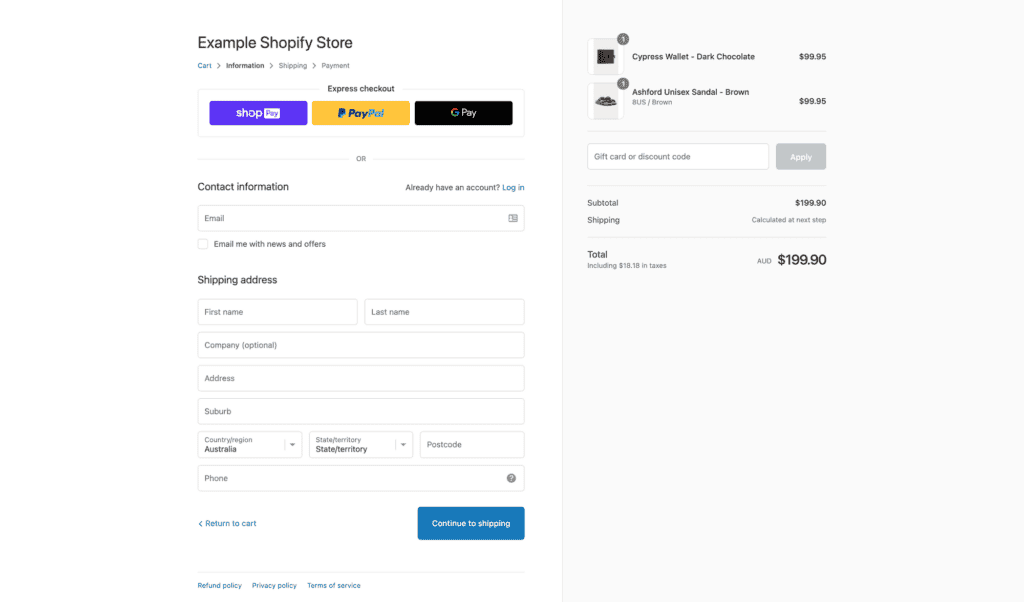
Step 5 – Set Up Payments, Taxes and Shipping
Before you launch your store, you must make sure customers can actually pay you and receive their orders. In this step, you’ll connect payment gateways, configure basic tax settings and set up your shipping rates so there are no surprises at checkout.
If you sign up through my special Shopify link, you get 3 months for just $1 per month, which gives you enough time to test payments and shipping without a big upfront cost.
Set up your payment methods:
- In your Shopify admin, click “Settings” in the bottom-left corner, then open “Payments”.
- If Shopify Payments is available in your country, click “Activate Shopify Payments” and follow the steps to enter your business details, bank account and payout information.
- Connect additional gateways like PayPal by clicking “Activate PayPal Express Checkout” and logging into your PayPal account.
- If you plan to use alternative payment methods (buy now, pay later, local wallets), add them in the same Payments screen under “Additional payment methods”.
Configure your basic tax settings:
- Still under “Settings”, click “Taxes and duties”.
- For most beginners, it’s best to start with Shopify’s automatic tax settings for your main selling country, unless your accountant tells you otherwise.
- Check that the correct regions are enabled and review whether prices in your store should include or exclude tax, based on how your market usually displays prices.
Set up your shipping zones and rates:
- In “Settings”, open “Shipping and delivery”.
- Under “Shipping”, edit your main shipping profile and define shipping zones (for example, United States, Europe, Rest of world).
- For each zone, add your shipping rates: flat rate (e.g. $4.99), free shipping above a certain order value (e.g. free over $50), or carrier-calculated rates if you use a real-time integration.
- Save your changes and, if possible, place a test order later to make sure the correct shipping options appear at checkout.
Step 6 – Create Essential Pages and Navigation
Before you launch, your store needs basic information pages and a clear menu. These pages build trust with visitors and help both customers and search engines understand who you are and how your business works.
Create your core pages
Start with a simple About, Contact and FAQ page. They don’t need to be perfect, but they should answer the most important questions your visitors have.
- In your Shopify admin, go to “Online Store → Pages” and click “Add page”.
- Create an “About” page that explains who you are, what you sell and why customers should trust your brand.
- Create a “Contact” page with a contact form, email address and any social links where people can reach you.
- Create a simple “FAQ” page that answers common questions about shipping, returns and processing times.
Add your legal policies
Your store also needs basic legal policies. Shopify can generate starter templates, which you can later refine with a legal professional if needed.
- In your Shopify admin, click “Settings → Policies”.
- Use Shopify’s built-in templates to generate a Refund Policy, Privacy Policy, Terms of Service and Shipping Policy.
- Review the text, adjust it to match how you actually handle returns, data and shipping, and save each policy.
- After saving, Shopify can automatically link these policies in the footer and at checkout.
Set up your main navigation
Finally, connect your pages and collections to a simple main menu so visitors can find everything in one or two clicks.
- In the Shopify admin, go to “Online Store → Navigation”.
- Open the “Main menu” and add links to your key pages: Home, Shop (or main collection), About, Contact and FAQ.
- Add links to your most important collections (for example, “Best Sellers” or “New Arrivals”) so users can jump straight into shopping.
- Save the menu and refresh your storefront to make sure all links work correctly.
Step 7 – Test Everything and Launch Your Store
Before you officially launch, you should walk through your store like a real customer. A quick test run helps you catch broken links, missing information and checkout issues before you start sending traffic.
Place a test order
A test order lets you confirm that your products, shipping rates, taxes and payment methods all work together correctly at checkout.
- In your Shopify admin, add at least one test product to your store (or use one of your real products).
- Follow Shopify’s instructions to enable a test payment method or “Bogus gateway” so you can place a test order without charging a real card.
- On your storefront, add the product to the cart, go through checkout, select a shipping option and complete the order using the test payment method.
- In the admin, confirm that the order appears correctly under “Orders” and that you received the order notification email.
Remove the password and go live
Once your test order looks good and you’re happy with the basic design, it’s time to remove the storefront password and open your store to the public.
- In the Shopify admin, go to “Online Store → Preferences”.
- Scroll down to the “Password protection” section.
- Uncheck the option that restricts access to visitors, or remove the password, so your store becomes publicly accessible.
- Save your changes, visit your store in an incognito/private browser window and make sure everything loads correctly without asking for a password.
If you haven’t started yet, you can use my special Shopify link to get 3 months for just $1 per month and follow this guide step by step while you build your first store.
Prerequisites Before You Start
Before hitting that Shopify signup button, take 30 minutes to get these basics right. I skipped most of this on my first store and wasted two weeks fixing dumb mistakes.
What You’ll Need
- Domain name: Grab something simple like yourstore.com ($12/year via Namecheap). Don’t use free .myshopify.com – looks amateur.
- Budget breakdown: Basic plan $29/month + domain $1/month + apps $10-20 = ~$50 start.
- Product idea validated: Use Google Trends or TikTok search. Aim for “demand > competition”.
Budget Table for First Month
| Item | Cost | Notes |
|---|---|---|
| Shopify Basic | $29 | First 3 months $1 promo |
| Domain | $12/year | Namecheap or GoDaddy |
| Stock images | Free | Unsplash/Pexels |
| Apps (essential) | $0-15 | DSers free tier |
| Total | $40-55 | Realistic beginner |
My tip: Start with dropshipping – zero inventory risk
Common Beginner Mistakes (And How I Fixed Them)
Look, everyone screws up their first Shopify store. Here’s what killed my early attempts – and exactly how to avoid.
Mistake #1: Wrong Plan Choice
Picked Basic, hit 100 orders limit, chaos. Fix: Start Basic, upgrade at $5k/month revenue.
Mistake #2: Skipping Policies
Legal nightmare. Shopify has templates – fill them ALL: Privacy, Refund, Shipping. Go to Settings → Policies → Edit templates.
Mistake #3: Crappy Product Photos
Blurry phone pics = 50% drop in conversions. Fix: Use Canva templates or Shopify’s new AI image editor (Winter ’26).
Mistake #4: No Test Orders
Launched blind, checkout broke. Fix: Settings → Payments → Test mode → Buy your own product.
From my second store: Added policies + tests = conversion rate from 0.8% to 2.1%. Worth the hour.
What’s New in Shopify 2026 (Don’t Miss These)
Shopify Winter ’26 Edition dropped 150+ updates. As a beginner, focus on these game-changers:
AI Sidekick – Your Virtual Assistant
Text commands like “Make buttons bigger” or “Fix mobile spacing”. No code needed. I’ve used it to tweak themes in 2 minutes vs 2 hours manual.
Agentic Storefronts
Your products auto-appear in ChatGPT/Copilot. New free traffic channel – setup in 5 clicks under Sales Channels.
2048 Product Variants
Clothing stores: sizes/colors/materials all in one product. No more 100-variant limit hell.
Pro move: Enable Sidekick Day 1. Saved me 10 hours last month.
Advanced Setup for Growth
Once basic store runs:
- Apps: DSers (dropship), Klaviyo (email) – free tiers first.
- Custom domain: DNS setup (10 min video tutorial).
- Analytics: Connect Google Analytics 4 + Facebook Pixel.
Total time added: 2 hours. ROI: Track everything from Day 1.
Essential Shopify Apps for Beginners
Don’t overload with 20 apps Day 1 – that’s a trap. I made that mistake and store slowed to a crawl. Start with these 5 must-haves (all free/basic tier). They’ll handle 80% of your needs.
Top 5 Starter Apps
| App | Purpose | Why Beginners Love It | Pricing |
|---|---|---|---|
| DSers | Dropshipping | AliExpress integration, auto-fulfill | Free tier |
| Judge.me | Reviews | Easy photo reviews, 4.9 rating | Free |
| Shopify Email | Marketing | Built-in, drag-drop templates | 10k emails free/mo |
| PageFly | Landing pages | No-code builder for sales pages | Free plan |
| Klaviyo | Email flows | Abandoned cart magic | Free <250 contacts |
Install tip: Apps → Search → “Built for Shopify” badge = official/vetted. From my stores, DSers + Judge.me alone boosted sales 25%.
Complete Shopify Launch Checklist 2026
Print this. Check off before removing password page. I skipped half on launch day – pure pain.
Pre-Launch
- All policies live (Privacy, Shipping, Refund)
- Test checkout 3x (different cards)
- Mobile preview perfect (Chrome DevTools)
- Google Analytics firing (GA4)
Day 1 Post-Launch
- Remove store password
- Announce on social (TikTok best for ecom)
- Run $20 Facebook test ad
- Email list signup live
Missed the test checkout? Your first real customer breaks it live. Learned hard way.
Scaling Your Store: First 30 Days Plan
Store live ≠ success. Here’s my exact playbook from $0 to $3k first month.
Week 1: Traffic Basics
- TikTok Shop integration (free app)
- Post 3x/week: “Behind the scenes” store setup
- SEO: Submit sitemap to Google Search Console
Week 2-4: Optimization
- Check Shopify reports → fix high cart abandonment
- A/B test headlines (Google Optimize free)
- Email welcome sequence (Shopify Email)
Real numbers: Week 1: 50 visitors, 0 sales. Week 4: 300 visitors, $800 revenue. Patience + iteration.
FAQ: How to Start Shopify Store
How much does Shopify cost to start?
Basic $29/month. Total first month ~$50 with domain/apps. No hidden fees.
Do I need inventory?
No – dropship with DSers. I started with $0 stock.
How long to launch?
4-6 hours following this guide. My first took 2 days (learning curve).
Shopify vs WooCommerce?
Shopify wins for speed/support. Woo better if you’re dev.
Can I switch themes later?
Yes, but backup first. Dawn theme safest starter.
If you haven’t started yet, you can use my special Shopify link to get 3 months for just $1 per month and follow this guide step by step while you build your first store.